 Save to Pinterest
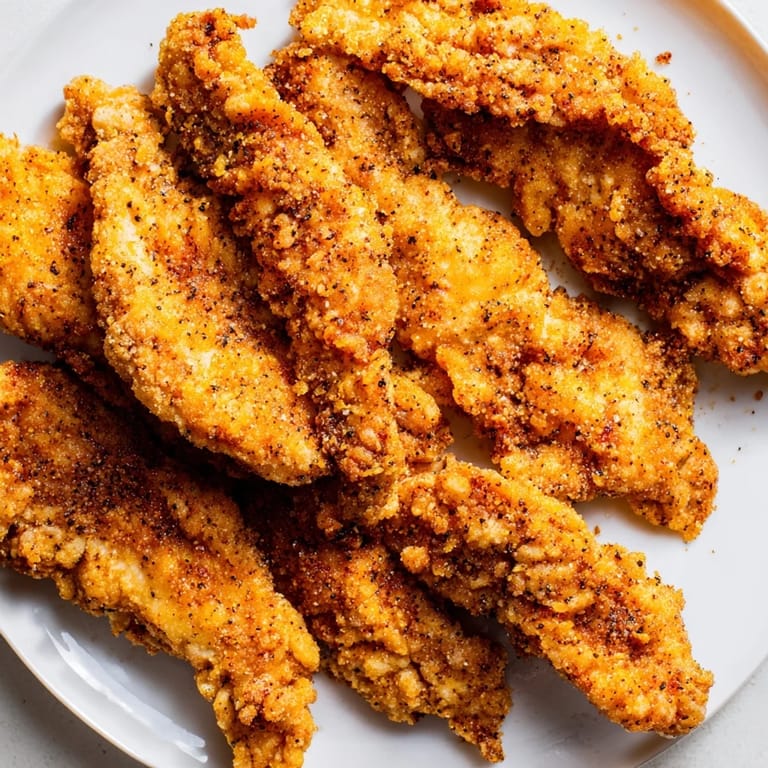
 There's something about the sound of chicken hitting hot oil that takes me straight back to my aunt's kitchen on a lazy Sunday afternoon. She'd pull chicken tenders from a buttermilk bath, dredge them in seasoned flour with such certainty, and suddenly the whole house smelled like golden, crispy comfort. I must have watched her make these a dozen times before I finally asked for the real secret, and it turned out to be patience—letting that buttermilk do its quiet work for hours while we did other things. Now whenever I make a batch, I'm struck by how something so simple can taste like home.
I made these for my daughter's lunch box phase, when she went through a stage of refusing anything that wasn't fried and golden. She'd open that container at school and trade with everyone at her table, and suddenly I was the cool mom who made 'restaurant chicken.' It's funny how food becomes a small currency of love in a lunchroom.
Ingredients
- Chicken tenders or breasts cut into strips: Use fresh chicken if you can, and don't skip cutting the breasts into uniform pieces so they cook evenly—thick spots will stay raw while thin edges burn.
- Buttermilk: This is the magic ingredient that tenderizes and adds tang; if you don't have it, mix regular milk with a tablespoon of lemon juice and let it sit for five minutes.
- Salt, black pepper, garlic powder, onion powder, paprika: These aren't just flavor fillers—they build layers so you taste something different with each bite, not just 'fried chicken.'
- Cayenne pepper: Optional, but a quarter teaspoon adds intrigue without overwhelming heat.
- All-purpose flour: The baking powder mixed in here is the real trick for that extra crispy exterior.
- Vegetable oil: Use something neutral with a high smoke point; I've learned the hard way that fancy oils burn and bitter everything up.
Tired of Takeout? 🥡
Get 10 meals you can make faster than delivery arrives. Seriously.
One email. No spam. Unsubscribe anytime.
Instructions
- Mix your marinade:
- Whisk buttermilk with all the spices—salt, pepper, garlic powder, onion powder, paprika, and cayenne if using. The mixture should smell like something you want to eat, warm and savory.
- Coat and chill:
- Toss the chicken in, making sure every piece gets submerged in that tangy bath. Cover and let it sit in the fridge for at least two hours, though overnight is when the real transformation happens.
- Set up your dredging station:
- Combine flour with salt, pepper, paprika, garlic powder, onion powder, and baking powder in a shallow dish. The baking powder is the secret—it reacts with the moisture and creates little pockets of crispiness.
- Coat each tender:
- Pull the chicken from the buttermilk, let the excess drip back into the bowl, then press each piece firmly into the flour mixture. You're not just dusting it; you're creating a crust that will shatter when you bite into it.
- Heat your oil:
- Pour about two inches of oil into a large, deep skillet or Dutch oven and bring it to exactly 350°F. Use a thermometer—I learned this the hard way when I guessed and ended up with greasy, pale chicken that nobody wanted to eat.
- Fry in batches:
- Working in groups so you don't crowd the pan, carefully slide the tenders into the hot oil. They should sizzle immediately, a sharp, inviting sound that tells you the temperature is right.
- Cook until golden:
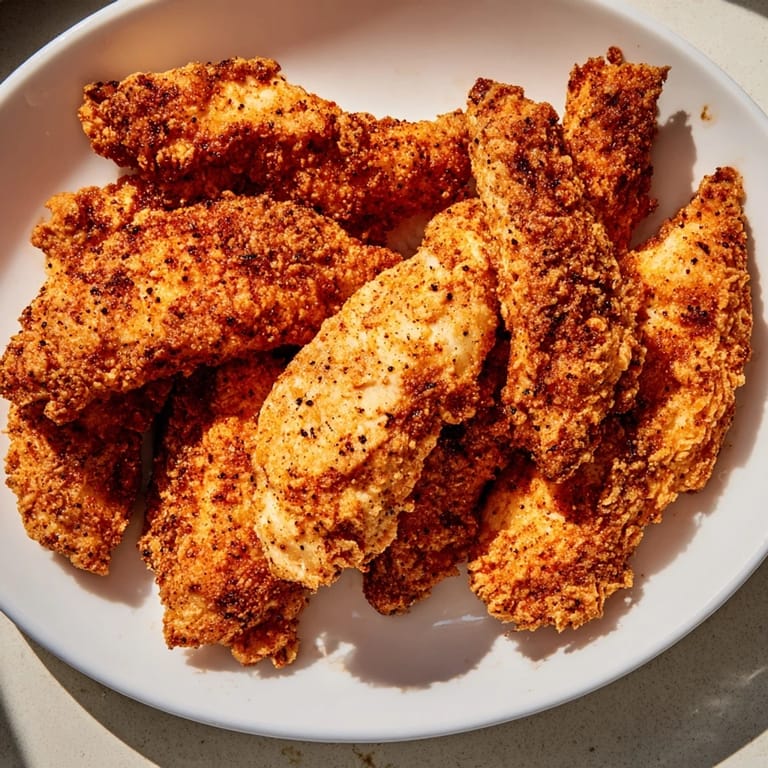
- Give them three to four minutes per side, until they're a deep golden brown and the internal temperature hits 165°F. The color is your guide—pale means not done, dark golden means perfect, burnt means next time.
- Rest and serve:
- Drain them on a wire rack or paper towels so they stay crispy on the bottom. Serve immediately while they're still warm and the outside still cracks when you bite into it.
 Save to Pinterest
 The best moment with this recipe happened on a rainy Wednesday when my neighbor smelled them frying and appeared at my back door with her kids, asking if we had extras. We didn't, so I made another batch right then, and suddenly a quiet afternoon turned into a spontaneous kitchen full of laughter and people.
The Buttermilk Difference
Buttermilk is acidic, which breaks down the proteins in the chicken and makes it tender no matter how long you cook it. I used to make fried chicken without marinating and wondered why it came out dry, until someone explained this simple chemistry to me. Now I understand that the tangy flavor you taste comes from that acidic bath doing the work, and it's why this recipe doesn't need heavy cream or egg-heavy batters to stay juicy.
The Oil Temperature Game
Getting the oil temperature right is the difference between fried chicken and fried chicken that tastes like it was cooked in sadness. At 350°F, the outside crisps before the inside has time to dry out—it's the sweet spot where physics and chemistry meet on your plate. I've watched people rush this step or guess at the temperature, and the results are always disappointing.
Serving and Variations
These tenders shine with honey mustard, ranch, or hot sauce, but they're honestly good enough to eat plain straight from the paper towels. They're also perfect cold the next day, packed into a lunch or eaten as a late-night snack standing at the kitchen counter. The double-dip trick makes them even more irresistible if you're willing to spend the extra few minutes on the coating.
- Make a spicy version by adding hot sauce directly to the buttermilk marinade or increasing the cayenne.
- For a milder batch, reduce the spices in the marinade and coat and let kids help with the dredging.
- Leftover oil can be strained and reused once if you keep it clean and cool.
 Save to Pinterest
 This is comfort food at its most honest—crispy, juicy, and always reliable. Make it once and you'll understand why it's been a staple for generations.
Recipe Questions & Answers
- → Why marinate chicken in buttermilk?
Buttermilk tenderizes the meat by breaking down protein, resulting in juicy, flavorful chicken with a subtle tang.
- → How do I achieve a crispy coating?
Coat the chicken in a well-seasoned flour mixture and fry in hot oil (around 350°F) to get a golden, crunchy crust.
- → Can I double coat for extra crunch?
Yes, dip the coated chicken back into buttermilk, then flour again before frying for an extra crispy texture.
- → What oil is best for frying?
Use a neutral oil with a high smoke point, like vegetable or canola oil, to maintain crispiness and prevent burning.
- → How do I know when chicken is fully cooked?
The internal temperature should reach 165°F (74°C), ensuring juicy, safe-to-eat chicken tenders.