 Save to Pinterest
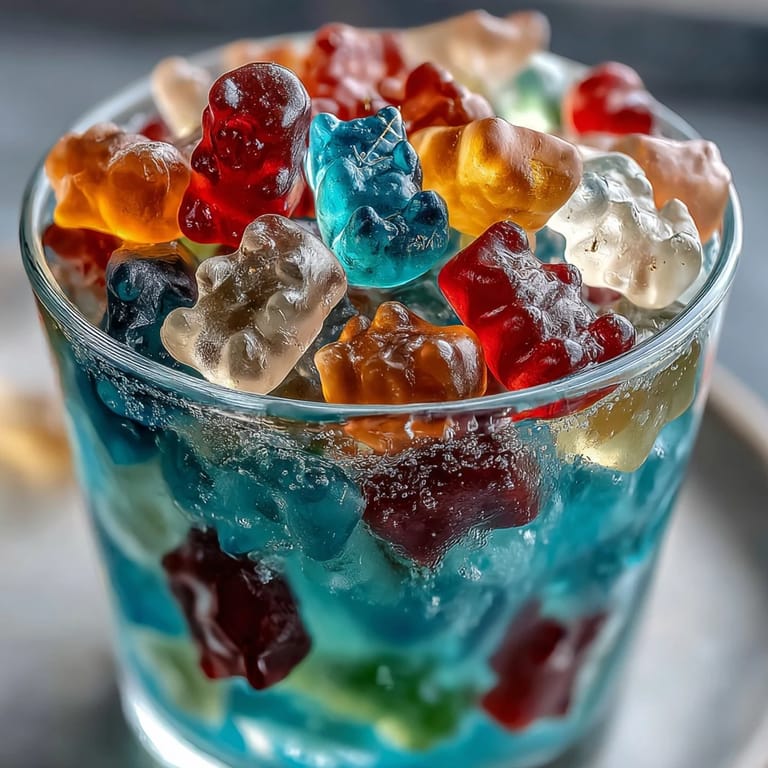
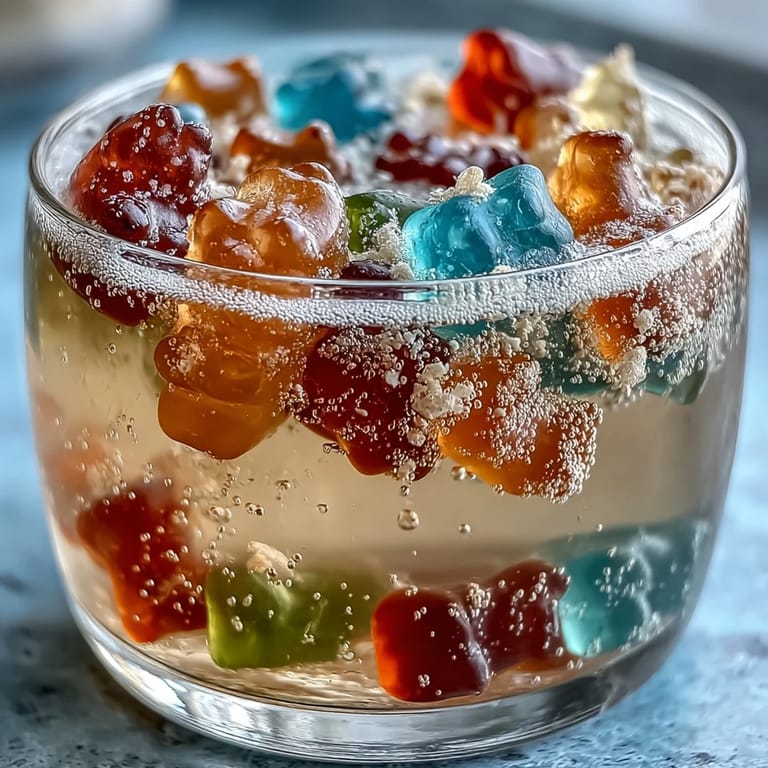
 The first time I put these Gummy Bear Lemonade Jelly Cups together, it was honestly all about the colors. Admittedly, the sun was streaming through my window, and seeing those little gummy bears practically glow in the cups brought out my inner child. Making them filled the kitchen with the fresh burst of lemon and that familiar, almost mischievous, smell you get opening a bag of candy. There was some laughing at how the gummy bears seemed to huddle together in the jelly, each cup a small, wobbly party. I think what I love most is how sneaky-simple they are—no one ever believes it took me less than fifteen minutes of hands-on time.
One summer afternoon, I made a big batch of these with my niece, both of us getting sticky fingers from sneaking too many gummy bears from the bowl. She was in charge of lining the cups, very serious about color balance, while I handled the zesting—except for that moment when she stole the lemon and insisted on sniffing it for a good minute before returning it.
Ingredients
- Fresh lemon juice: Using fresh lemons transforms the flavor—I've tried bottled and it's just not the same.
- Water: Keeps the lemonade jelly perfectly balanced, and I find using filtered water keeps the taste clean.
- Granulated sugar: Sweetens the tart lemon without overpowering it; don't skimp, but don't heap it, either.
- Unflavored gelatin powder: The secret to that perfectly wobbly, jiggly texture—let it bloom fully for best results.
- Lemon zest: Brightens the jelly and gives the cups a sunny aroma that hits the moment you open the fridge.
- Assorted gummy bears: Don't overthink the colors—the more chaotic, the more fun when you scoop.
- Fresh mint leaves: Totally optional, but they add a pop of green and a dash of garden-fresh scent.
- Lemon slices: I love the look of a thin wheel tucked on the rim (if you're feeling fancy).
Tired of Takeout? 🥡
Get 10 meals you can make faster than delivery arrives. Seriously.
One email. No spam. Unsubscribe anytime.
Instructions
- Bloom the gelatin:
- Stir together the lemon juice, water, and sugar in a saucepan, then sprinkle the gelatin over and let it sit for 2 minutes—you’ll see it start to look wrinkly on top as it soaks up the liquid.
- Dissolve and infuse:
- Warm the pan gently over medium heat, stirring without pause until the sugar and gelatin vanish into silky clarity; keep the heat low so you don’t accidentally boil it, then stir in the lemon zest just off the heat.
- Arrange the gummy bears:
- Scatter a huddle of 10 to 15 gummy bears into each serving cup; don’t worry if they tip or lean, that’s half the charm.
- Pour and fill:
- Carefully pour the lemonade mixture over the gummy bears, filling each cup and enjoying the little fizzing sounds they make as they settle.
- Cool and chill:
- Let the cups cool for 10 minutes on the counter, then transfer to the fridge for at least 2 hours until the jelly is set and firm to touch.
- Decorate and serve:
- Top with mint leaves and lemon slices just before serving if you like—this part always makes them feel instantly party-ready.
 Save to Pinterest
 One night, I brought these out after a barbecue and watched a grown-up friend fish out her favorite color gummies before the jelly had even fully set, grinning like a kid—there’s something about these that brings everyone back to the simple joy of summer snacks.
Choosing and Swapping Gummy Bears
The type of gummy bears really affects both flavor and color—I've tried sour, cola, and classic fruit, and each batch came out totally unique. If allergies are a concern, I always double-check the brand (some are gluten-free, some not), and if I want to make them vegetarian, I grab agar-agar and plant-based gummies, which hold up surprisingly well.
The Lemonade Jelly Secret
Zesting straight into the pan after the jelly dissolves means you get all those fragrant oils right where they should be—not left behind on a cutting board or zester. I sometimes rub the zest into the sugar first for even more aroma; it’s a tiny step that makes the jelly cups taste freshly squeezed in every bite.
Make-Ahead Tips for Stress-Free Parties
These jelly cups are the easiest make-ahead treat—once set, they’re nearly unbreakable in the fridge, and actually taste better after a few hours. I've even stacked them (carefully) with a layer of plastic wrap in between, and they held up through a road trip to a friend’s house without slipping or leaking.
- Use a measuring jug to pour the jelly for less mess.
- Try chilling the empty cups first—the bears resist melting and glooping.
- Always sneak in a taste test before serving to make sure the set is perfect.
 Save to Pinterest
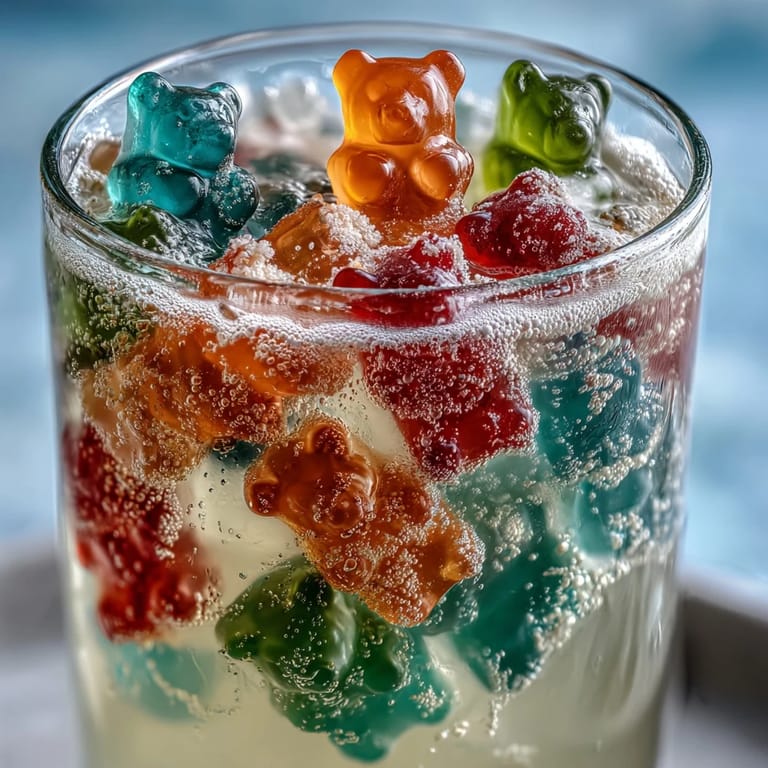
 These jelly cups aren’t just for kids—they’re guaranteed to steal the spotlight at any party, and watching everyone dig in is half the reward for making them.
Recipe Questions & Answers
- → How long do these cups need to chill?
Chill for at least 2 hours or until fully set; smaller cups may set faster. After an initial 10-minute cool at room temperature, transfer to the fridge to firm up evenly.
- → Will the gummy bears sink to the bottom?
Some settling can occur. Arrange gummy bears in the cups and pour the warm gelatin slowly to help suspend them. Let cups cool slightly before refrigerating to reduce movement.
- → Can I use agar-agar instead of gelatin?
Yes. Follow the agar-agar package instructions—typically it requires boiling to activate and sets firmer and more brittle than gelatin. Adjust quantities and cool times as needed.
- → How can I keep the jelly clear?
Use strained fresh lemon juice, dissolve gelatin fully without boiling, and skim any foam during heating. Pour gently into cups to avoid trapping bubbles for a clearer set.
- → Can these be made ahead and stored?
Prepare up to 48 hours in advance and keep covered in the refrigerator. Hold garnishes like mint and lemon slices until just before serving to maintain freshness and appearance.
- → How can I make an adult version?
Replace up to 1/4 cup of the water with vodka for a light adult twist. Avoid adding too much alcohol, as it can prevent the gelatin from setting properly.