 Save to Pinterest
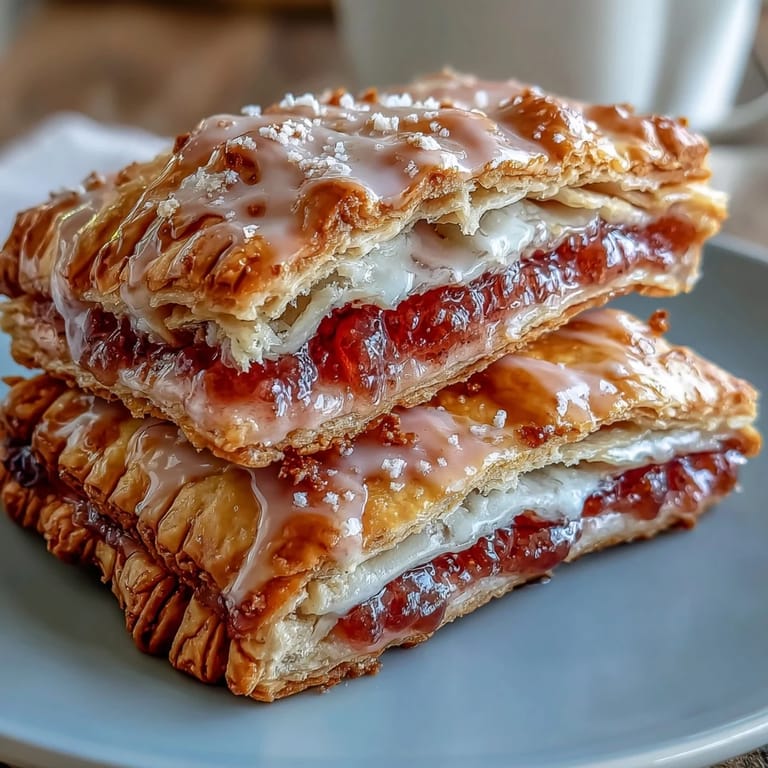
 My cousin brought homemade pop tarts to a beach picnic last summer, and I couldn't believe how much better they tasted than the store-bought version. When she mentioned the filling was guava and cream cheese, something clicked—that tropical-creamy combination felt like a warm hug wrapped in buttery pastry. I spent the next week pestering her for the recipe, and now these are the first thing I make when I want to impress someone at breakfast, or honestly, just when I need an afternoon pick-me-up that doesn't feel guilty.
I made these for my roommate's birthday morning, and watching her face when she bit into one warm from the oven—eyes widening, then this little satisfied smile—that's when I knew this recipe was a keeper. She said it tasted like someone who actually cared had made breakfast, which, honestly, felt like the highest compliment.
Ingredients
- All-purpose flour: Use 2 1/4 cups (280 g) because it gives you the best flaky-to-tender ratio; don't sift unless your flour is really compacted.
- Unsalted butter, cold and cubed: The 1 cup (225 g) needs to stay cold so it creates those beautiful flaky layers; cut it into cubes before you start so it's easier to work with.
- Ice-cold water: Use exactly 1/3 cup (80 ml) and keep it truly cold; this is the thing that makes or breaks your pastry texture.
- Guava paste or thick guava jam: The 3/4 cup (200 g) should be thick enough to hold its shape; thin jams will weep out during baking and make soggy corners.
- Cream cheese, softened: Use 4 oz (115 g) and let it sit at room temperature for at least 30 minutes; cold cream cheese lumps up and won't mix smoothly.
- Powdered sugar: You'll need 2 tablespoons in the filling and 1 cup (120 g) for the glaze; it dissolves easily in both applications.
- Large egg: One egg beaten with a tiny splash of water creates the most gorgeous golden shine on top.
Tired of Takeout? 🥡
Get 10 meals you can make faster than delivery arrives. Seriously.
One email. No spam. Unsubscribe anytime.
Instructions
- Make the pastry foundation:
- Whisk together your flour, sugar, and salt in a large bowl, then add those cold butter cubes and use a pastry blender (or honestly, your fingertips work great) to cut it all together until it looks like coarse breadcrumbs. This step is where the magic starts, so don't rush it.
- Bring the dough together:
- Drizzle in the ice-cold water gradually while mixing gently with a fork until the dough just barely comes together—it should look slightly shaggy. Divide it in half, flatten each half into a disk, wrap tightly in plastic wrap, and refrigerate for at least 30 minutes; this chill time is non-negotiable.
- Prepare the creamy filling:
- In a small bowl, beat the softened cream cheese with powdered sugar and vanilla extract until smooth and fluffy, about 2 minutes. Taste it and smile a little because this filling is genuinely delicious on its own.
- Roll and cut the pastry:
- On a lightly floured surface, roll out one dough disk to about 1/8-inch thickness, then cut it into 8 rectangles roughly 3 by 4 inches. You want them uniform so they bake evenly.
- Fill with intention:
- Place 1 teaspoon of guava paste in the center of 4 rectangles, then add 1 teaspoon of cream cheese mixture next to it, leaving about a half-inch border all around. The border is important because it's your seal.
- Seal and crimp:
- Brush the edges of each filled rectangle with beaten egg, then top each with an unfilled rectangle and press the edges firmly to seal them together. Use a fork to crimp the edges—this isn't just for looks, it actually keeps the filling inside where it belongs.
- Chill before baking:
- Transfer your pop tarts to a parchment-lined baking sheet and refrigerate for 10 minutes while you preheat the oven to 375°F (190°C). This little chill helps them hold their shape.
- Brush and vent:
- Give each pop tart a gentle brush of egg wash, then prick the top a few times with a fork to let steam escape during baking. This prevents them from puffing up too much.
- Bake until golden:
- Bake for 22 to 25 minutes until the pastry is a deep golden brown and smells absolutely incredible. You'll know they're done when the edges are darker than the centers.
- Glaze and finish:
- Once cooled completely, whisk together powdered sugar, milk, and vanilla until you have a pourable glaze, then add a drop or two of pink or red food coloring if you want that classic pop tart look. Drizzle or spread the glaze over the top and let it set for 10 minutes before serving.
 Save to Pinterest
 There's something deeply satisfying about biting into a pastry you made with your own hands and having it actually stay together, stay flaky, and taste better than anything you could buy. These pop tarts have become my answer when someone says they wish breakfast was more special.
Why Guava and Cream Cheese Actually Work
The first time I made these, I wasn't entirely convinced that guava would work well with cream cheese, but it turns out they're a classic pairing in Latin American baking for a reason. The tartness of the guava cuts through the richness of the cream cheese, and together they create this brightness that feels almost festive on your tongue. It's the kind of flavor combination that makes you pause mid-bite and think, yes, this is exactly what I didn't know I needed.
Storage and Make-Ahead Magic
You can actually make these pop tarts up to 3 days in advance if you store them in an airtight container, which means you could bake a full batch on Sunday evening and have elegant breakfasts ready all week. I've even frozen the filled, unbaked pop tarts in a freezer-safe container for up to a month—just add 5 extra minutes to the baking time if you bake them straight from frozen.
Customizing Your Filling
While guava is absolutely the star of this show, the pastry itself is forgiving enough to work with other flavor combinations if you're feeling adventurous. I've made versions with strawberry jam and cream cheese, apricot with a hint of almond extract, and even a blackberry-mascarpone situation that turned out surprisingly sophisticated.
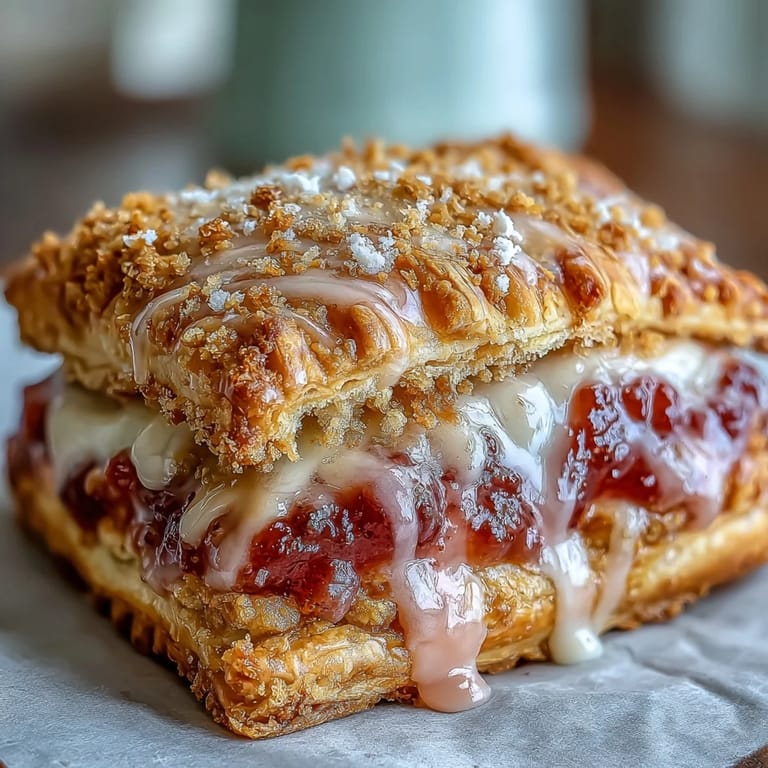
- For extra crunch, sprinkle coarse sugar on top before baking—it catches the oven light beautifully and adds a subtle textural contrast.
- If you want them sweeter, add an extra tablespoon of powdered sugar to the glaze, but taste as you go because the guava paste is already quite sweet.
- Keep your pastry tools cold by stashing your rolling pin and cutting board in the freezer for 15 minutes before you start rolling.
 Save to Pinterest
 These homemade pop tarts prove that breakfast doesn't have to be quick or boring to be convenient. Once you've made them once, you'll understand why they're worth the effort.
Recipe Questions & Answers
- → Can I use other fruit fillings besides guava?
Absolutely. While guava provides that signature tropical sweetness, you can substitute with strawberry, apricot, raspberry, or mango jam. Just ensure the fruit preserve is thick enough to prevent leaking during baking.
- → How do I store these pastries?
Store completely cooled pastries in an airtight container at room temperature for up to 3 days. For longer storage, wrap individually and freeze for up to 2 months. Reheat in a 350°F oven for 5-7 minutes to restore crispness.
- → Why does the dough need to chill?
Chilling relaxes the gluten and firms up the butter, which prevents shrinking during baking and ensures those signature flaky layers. The 30-minute chill time is essential for achieving that tender, melt-in-your-mouth texture.
- → Can I make the dough ahead of time?
Yes, the dough can be wrapped tightly and refrigerated for up to 2 days before using. You can also freeze the dough disks for up to 3 months. Thaw overnight in the refrigerator before rolling out.
- → What's the best way to seal the edges?
Brushing the edges with beaten egg wash creates a strong bond between the top and bottom dough layers. Press firmly with your fingers first, then crimp with a fork to create a tight seal that prevents filling from leaking during baking.