 Save to Pinterest
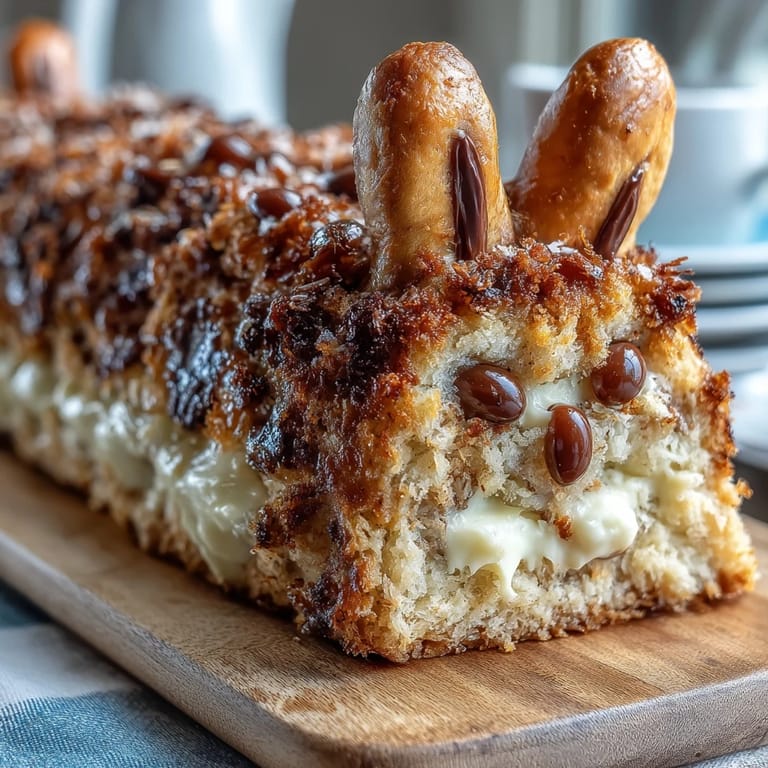
 My daughter pressed her nose against the bakery window that Easter morning, eyes locked on a bunny cake with floppy ears made from cake scraps. I couldn't afford the $45 price tag, but something about that whimsical creation stuck with me—so that afternoon, I cleared the kitchen counter and decided we'd make our own. What started as a slightly chaotic baking adventure turned into one of those perfect moments where the mess didn't matter, because halfway through frosting, she discovered the hidden sprinkles inside and gasped like she'd found buried treasure.
Years later, I made this cake for a school fundraiser bake sale, and watching kids' faces light up when they spotted the bunny shape on the table told me everything. One little boy insisted on buying two slices—one to eat right then and one to save because he wanted to show his dad the sprinkles hidden inside first. That's when I realized this cake had become less about impressing people and more about creating small moments of wonder.
Ingredients
- All-purpose flour (3 cups): The backbone of your cake—make sure it's fresh and spooned, not scooped straight from the bag, or your cake might turn out dense.
- Baking powder (2½ tsp): This is what gives your bunny cake that light, tender crumb that makes people ask for seconds.
- Salt (½ tsp): A pinch of salt amplifies sweetness and balances flavors in ways you won't consciously taste but will absolutely notice.
- Unsalted butter (1 cup for cake): Softened butter is non-negotiable here—take it out of the fridge 30 minutes before baking so it creams properly with sugar.
- Granulated sugar (2 cups): This sweetens the cake and, when creamed with butter, creates the fluffy texture that makes people think you bake professionally.
- Large eggs (4): Room temperature eggs incorporate air better and mix more smoothly into your batter—cold eggs can seize up the butter.
- Vanilla extract (1 tbsp plus 1½ tsp): Use pure vanilla if you can; imitation works in a pinch but tastes noticeably thinner.
- Whole milk (1 cup): This keeps the cake moist without making it heavy, and alternating it with flour creates a more stable batter.
- Assorted sprinkles (1 cup for center): The star of the surprise—choose sprinkles you'd actually enjoy eating, not just decorating with.
- Powdered sugar (4 cups): Sifted powdered sugar makes frosting smoother and prevents lumps that catch your spatula.
- Unsalted butter (1 cup for frosting): Fresh, softened butter makes frosting that pipes beautifully and tastes like clouds taste if clouds were sweet.
- Milk (2–3 tbsp for frosting): Add milk slowly—too much and your frosting becomes thin; too little and it's stiff as plaster.
- Pink food coloring (optional): Gel coloring stays vibrant longer than liquid food coloring and doesn't thin out your frosting.
- Shredded coconut (for fur): Toast it lightly in a dry pan first for deeper flavor and color that photographs beautifully.
- Candy eyes: Non-negotiable for personality—don't skip these.
- Pink jelly beans or candies (for nose): One perfectly placed pink jelly bean gives your bunny character that oversized eyes alone can't achieve.
- Marshmallows (for tail): A fluffy white marshmallow tail is peak Easter bunny energy.
Tired of Takeout? 🥡
Get 10 meals you can make faster than delivery arrives. Seriously.
One email. No spam. Unsubscribe anytime.
Instructions
- Prepare your oven and pans:
- Heat your oven to 350°F and grease those cake pans with butter or cooking spray, then dust with flour so your cake releases cleanly. Take five minutes to do this right—a stuck cake is heartbreaking.
- Mix your dry ingredients:
- In a bowl, whisk together flour, baking powder, and salt, breaking up any lumps as you go. This ensures your leavening agent distributes evenly and your cake rises consistently.
- Cream butter and sugar:
- Beat softened butter with sugar until the mixture looks pale, fluffy, and noticeably lighter in color—this usually takes 2–3 minutes with an electric mixer. This step incorporates air into your cake, creating that tender crumb everyone loves.
- Add eggs and vanilla:
- Add eggs one at a time, beating well after each one, then pour in vanilla and mix until everything looks glossy. If you rush this step or add eggs too quickly, your batter might look curdled, but keep mixing and it'll come together.
- Alternate flour and milk:
- Add your flour mixture in three parts, alternating with milk and starting and ending with flour, mixing on low speed until just combined. Overmixing here creates a tough cake, so stop as soon as streaks of flour disappear.
- Divide and bake:
- Pour batter evenly into both prepared pans and bake for 35–40 minutes until a toothpick inserted in the center comes out clean or with just a few moist crumbs. The smell at 35 minutes tells you it's almost ready—that's your signal to start checking.
- Cool properly:
- Let cakes rest in their pans for 10 minutes, then carefully turn them out onto wire racks to cool completely. If you skip the pan-cooling step, your warm cake breaks apart; too long in the pans and steam gets trapped.
- Create the hidden center:
- Once completely cool, use a 3-inch round cutter to cut a hole in the center of one cake layer, removing that disk carefully. Level your cakes with a serrated knife if they've domed on top—a flat surface is your friend for stacking.
- Build the surprise layer:
- Place your intact cake layer on your serving plate, spread a thin layer of frosting, then top with the holed cake layer. Fill that hole generously with sprinkles, then place the cake disk you cut out on top to seal in the surprise.
- Make your frosting:
- Beat softened butter until creamy, gradually add powdered sugar while mixing, then add vanilla and milk until your frosting is fluffy and spreadable. Taste it and add a pinch of salt if it needs a flavor boost.
- Shape your bunny:
- Frost the entire cake first, then cut your second cake layer to create ears and a bowtie shape—use the cake scraps strategically and don't stress about perfect cuts. Arrange these pieces on a large board with the round face to create your bunny silhouette.
- Decorate with personality:
- Add shredded coconut for fur, press candy eyes into place, top with a pink jelly bean nose, and add a marshmallow tail for that unmistakable Easter bunny look. Step back before you finalize placement and ask yourself if your bunny has character—it should.
- Chill before serving:
- Refrigerate for 30 minutes so the frosting sets and the surprise center stays intact when sliced. This chill time also makes the cake easier to cut cleanly.
 Save to Pinterest
 The magic of this cake happens in two moments: when you assemble it and feel like you're creating something impossible, and when someone cuts into that first slice and finds the sprinkles. It reminds us that simple, thoughtful effort creates memories more valuable than store-bought perfection ever could.
Shaping and Assembly That Actually Works
The bunny shape intimidates people until they actually try it, then they realize it's just one round cake for a face and two pieces from the second layer for ears. Honestly, your bunny doesn't need to be museum-quality—slightly wonky ears and an asymmetrical smile add charm rather than detract from it. I've learned that imperfection is permission to try again and embrace the result as uniquely yours rather than comparing it to bakery versions that had professional decorators and pressure.
Flavor Variations That Expand Your Options
A chocolate version emerges if you replace half a cup of flour with half a cup of cocoa powder—the sprinkle center becomes even more delightful against a darker cake. Strawberry extract mixed into the frosting and paired with pink coloring creates an entirely different vibe that leans spring rather than Easter bunny. I once experimented with almond extract as half the vanilla amount, and it created a subtle sophistication that made adults pause and ask what they were tasting.
Shortcuts Without Sacrificing Joy
Using a quality cake mix speeds everything up significantly while keeping the assembly and surprise center that make this recipe special. I'm not ashamed of that shortcut on busy years—the magic lives in the shape and the hidden sprinkles, not exclusively in homemade cake. Some years you have Saturday afternoon available; some years you're making this the morning of a party, and that's when you give yourself permission to build on a foundation that works.
- Gel food coloring gives you more vivid pink ears and nose without watering down your frosting like liquid coloring does.
- Pre-made buttercream from the grocery store bakery works if you're truly pressed for time, though homemade costs less and tastes fresher.
- Candies beyond jelly beans—think mini pastel chocolates, gummy eyes, or pink rock candy—can create completely different aesthetic moods.
 Save to Pinterest
 This cake taught me that baking isn't about achieving restaurant-quality precision—it's about creating something that brings people together and delights them. Make this Easter bunny cake, watch the surprised faces when sprinkles appear, and know you've created a tradition worth repeating.
Recipe Questions & Answers
- → How do I achieve the bunny shape?
Bake two 8-inch round cakes, cut one with a 3-inch cutter for the middle hole and trim the other to form ears and a bowtie. Assemble as shown in instructions.
- → What kind of sprinkles works best for the center?
Use assorted small sprinkles that won't melt during baking to maintain a colorful surprise inside.
- → Can I make this dairy-free?
Substitute butter and milk with plant-based alternatives and ensure sprinkles and decorations are dairy-free.
- → How to decorate the bunny's fur?
Shredded coconut adds a fluffy texture resembling fur, applied over the buttercream frosting.
- → What’s the best way to store this cake?
Keep chilled to preserve the frosting and sprinkle center, covered tightly to avoid drying out.