 Save to Pinterest
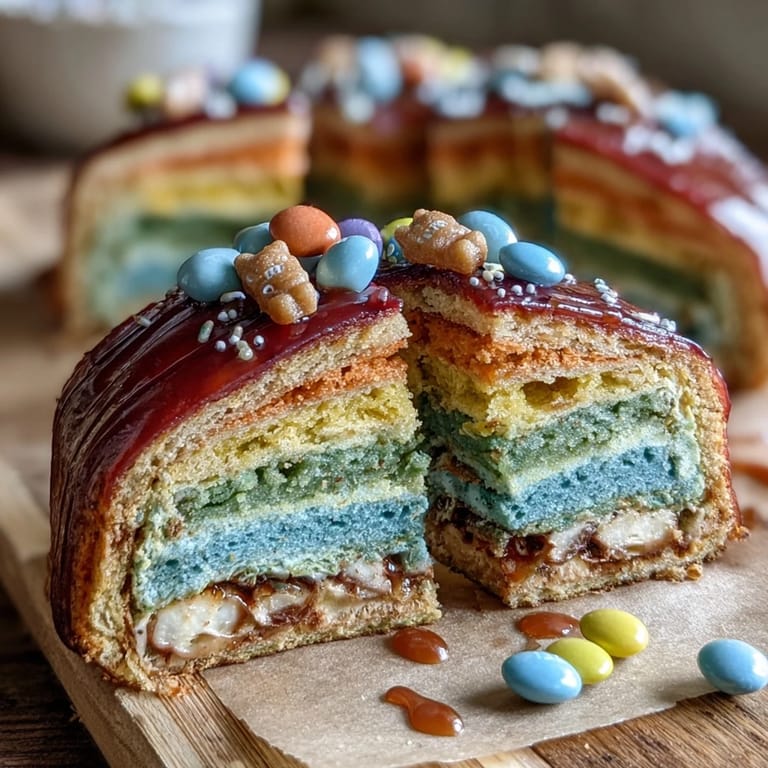
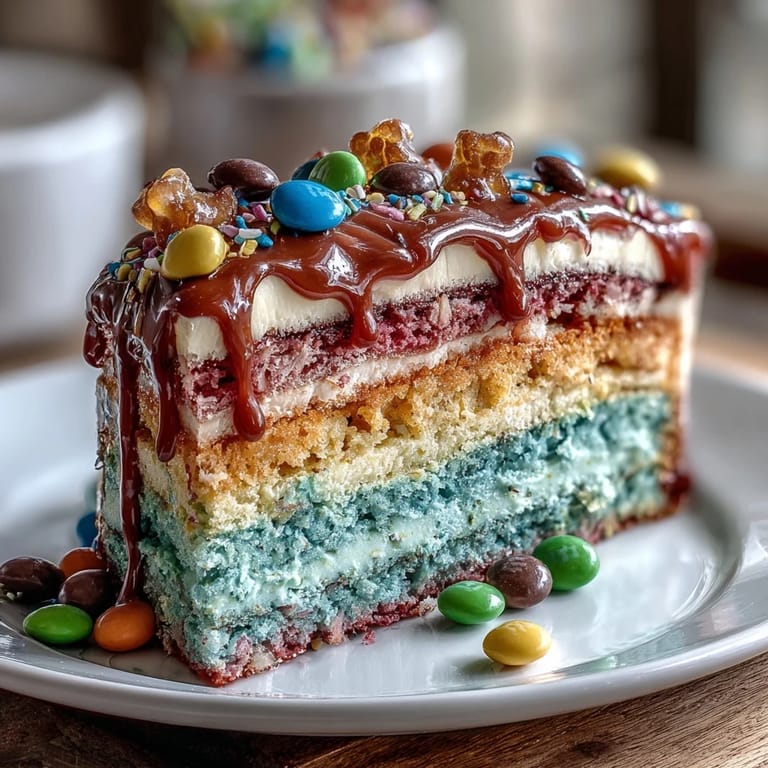
 My neighbor showed up at my door with a grin, asking if I could make something that would make her daughter's Cinco de Mayo party unforgettable. She didn't want just any cake—she wanted a surprise. That's when I remembered seeing a piñata cake online years ago and thinking it was too complicated. But standing there, covered in flour from an earlier baking mishap, I decided to give it a shot. The moment those first rainbow layers came out of the oven, I knew this cake was going to be something special.
I made this cake on a humid Saturday afternoon, the kitchen windows fogged up from the oven running in batches. My daughter wandered in asking what smelled so good, and when I showed her the six different colored batters lined up like a paint palette, she couldn't stop talking about it. By the time I finished assembling the layers and she saw that cavity getting filled with candy, she was already planning her own version in her head. That cake became less about Cinco de Mayo and more about the pure joy on everyone's face when they bit into that first slice.
Ingredients
- All-purpose flour: Use a good quality flour—it makes a difference in how tender the cake turns out, and I've learned to always measure by weight if possible.
- Baking powder and baking soda: Fresh leavening agents are crucial; old ones won't give you that perfect rise, so check your expiration dates before starting.
- Unsalted butter: Room temperature is non-negotiable here; cold butter won't cream properly with the sugar, and you'll end up with a dense cake.
- Granulated sugar: This dissolves into the batter and creates that tender crumb; don't skip the creaming step even though it seems long.
- Eggs: Room temperature eggs blend into the batter smoothly without creating lumps or breaking the emulsion.
- Vanilla extract: Real vanilla makes a noticeable difference, though pure almond extract adds an unexpected depth if you're adventurous.
- Whole milk: Room temperature just like the eggs; cold milk can seize up the batter and create an uneven texture.
- Gel food coloring: Gel gives you those vibrant, true colors without watering down the batter like liquid food coloring does.
- Assorted small candies: Pick candies you actually love eating because you'll definitely taste-test them while assembling—avoid anything sticky that might melt into the frosting.
- Powdered sugar: Sifting it first prevents lumps in your frosting and saves you frustration while beating.
Tired of Takeout? 🥡
Get 10 meals you can make faster than delivery arrives. Seriously.
One email. No spam. Unsubscribe anytime.
Instructions
- Get your oven ready and prep those pans:
- Preheat to 350°F while you line three 8-inch round pans with parchment and grease them well. This step prevents sticking and makes unmolding so much easier later.
- Whisk together your dry ingredients:
- Flour, baking powder, baking soda, and salt go into a medium bowl and get whisked together thoroughly. This ensures the leavening distributes evenly throughout the cake.
- Cream butter and sugar until fluffy:
- This takes about three minutes with an electric mixer and is where the magic begins. You're essentially beating air into the butter, which creates that tender crumb structure.
- Add eggs one at a time with care:
- Each egg gets beaten in thoroughly before the next one joins the party. This creates an emulsion that keeps everything smooth and prevents curdling.
- Mix in vanilla, then alternate:
- Add your dry mixture in three portions, alternating with the milk, and always start and end with dry ingredients. This method prevents overmixing, which would make the cake tough.
- Divide and color your batter:
- Split the batter into six bowls and tint each one—red, orange, yellow, green, blue, and purple. Add gel coloring drop by drop because it's potent, and you can always add more.
- Bake in batches if needed:
- Pour into pans and bake for 15-18 minutes until a toothpick comes out clean. Each layer should be golden and springy when gently touched.
- Cool with patience:
- Let layers rest in pans for 10 minutes, then transfer to wire racks to cool completely. Warm cake is fragile, and you need it cool before creating those center cavities.
- Cut out the surprise centers:
- Use a 3-inch round cutter to hollow out four of your six layers (save the top and bottom whole). You're creating the secret pocket that will hold your candies.
- Make frosting that's silky:
- Beat softened butter until it's pale, then gradually add sifted powdered sugar, milk, vanilla, and a pinch of salt. The gradual addition prevents lumps and keeps the frosting smooth.
- Stack and fill with intention:
- Start with your purple (bottom) whole layer on a plate, frost it lightly, then stack your first hollow layer. Repeat with each cut-out layer, creating a tower of rainbow cake.
- Pour in the piñata surprise:
- Once all the hollow layers are stacked, fill that center cavity generously with your chosen candies. This is the moment where anticipation really builds.
- Crown your creation:
- Place the final whole layer (your top layer) over the candy-filled center, then frost the entire outside. Decorate however the occasion calls for.
- Chill before the big reveal:
- Let the cake sit in the refrigerator for at least 30 minutes before slicing. Cold cake slices cleanly and prevents the frosting from smudging.
 Save to Pinterest
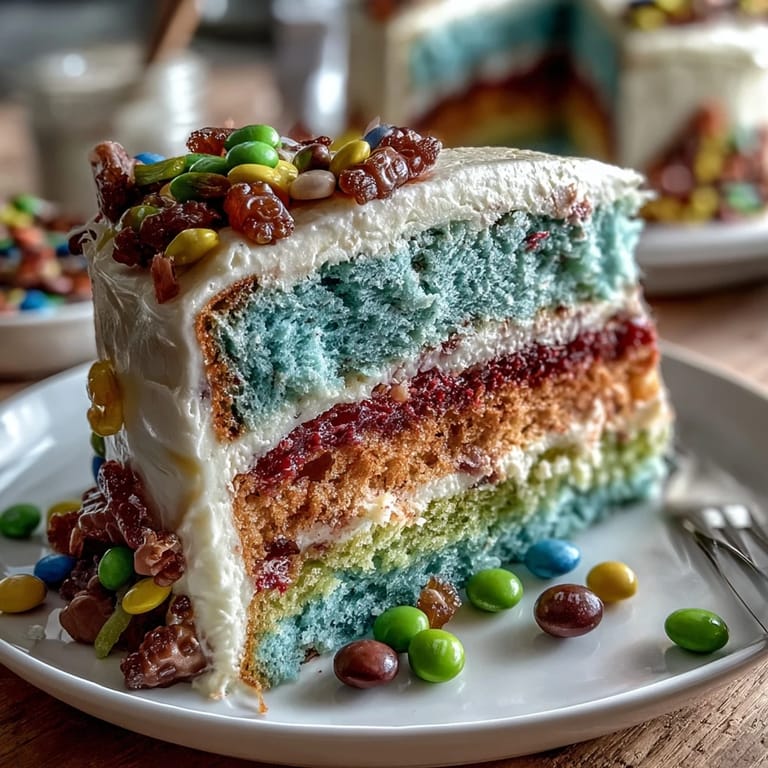
 When my neighbor's daughter took that first bite and her eyes went wide seeing all those candies tumble out, I saw why this cake matters. It wasn't about perfection or technique—it was that moment of pure surprise and delight that made the whole kitchen feel electric. That's when baking stopped being about following steps and became about creating memories that stick with people.
Rainbow Layers That Actually Stay Vibrant
Gel food coloring is a game-changer, and I can't stress this enough after watching liquid coloring turn my batters muddy and watery. The gel stays concentrated and doesn't alter the cake's texture, which means your colors stay true and vivid even after baking. I learned to add it drop by drop because the colors are potent, and you can always add more but you can't take it back. One time I got overzealous with the red and ended up with hot pink instead, but honestly, it still looked amazing.
The Assembly Dance
There's a rhythm to building this cake that becomes almost meditative once you get the hang of it. Each layer gets a thin frost, then you stack the next hollow one, moving systematically from purple to red to orange to yellow to green to blue. The frosting acts as glue, holding everything together while you work, and the key is not to overthink it or second-guess the structure. I used an offset spatula to smooth each layer, and having that tool in hand made me feel way more confident than I actually was.
Candy Selection and Storage Secrets
Choose your piñata candies wisely because they're the star of the show when that cake gets sliced. Avoid anything that will melt into the frosting or stick to everything, and remember that people will taste these candies fresh from inside the cake, so pick ones you genuinely enjoy. I've used mini M&Ms, gummy bears, and colorful chocolate chips with great results, and I always set aside a few to taste-test because quality control is important. Here's what I've learned works best:
- Keep candies away from direct frosting contact by using that center cavity as their dedicated space.
- Chill the assembled cake for at least 30 minutes so everything sets and the candies don't shift when you slice.
- Use a sharp, warm knife for slicing—run it under hot water and wipe it clean between cuts for the cleanest edges.
 Save to Pinterest
 This cake has become my secret weapon for celebrations that need a spark of magic. Every time someone discovers those candies hidden inside, I remember why I love baking—it's not about being perfect, it's about surprising people with something unexpected and delicious.
Recipe Questions & Answers
- → How do I create the colorful layers?
Divide the batter evenly into six portions and tint each with different gel food coloring before baking separately in pans.
- → What kinds of candies work best inside?
Use small, lightweight candies like mini M&Ms, sprinkles, or gummy bears to ensure easy slicing and a fun surprise.
- → Can I make this cake gluten-free?
Yes, substitute the all-purpose flour with a 1:1 gluten-free flour blend without altering other ingredients.
- → How should I prepare the cake layers to assemble?
After baking and cooling, cut a round cavity in the center of four layers leaving top and bottom intact for stacking.
- → What’s the best way to decorate the outside?
Frost the assembled cake smoothly and add colored frosting or festive sprinkles to complement the vibrant interior.
- → Any tips for clean slicing?
Chill the cake for at least 30 minutes before slicing to maintain structure and reveal the candy surprise neatly.